
How to Seal LED Strip Joints and Keep IP67
A cut joint is where the IP67 rating ends. The methods that restore it, the sealant that will not corrode copper, and the immersion test that proves it holds.
The IP67 rating does not survive the first cut. Not because the strip got worse, but because the rating was never the strip's to begin with: it belongs to the assembly that was tested — the sleeve, the end seals and the cable exit, in the exact configuration that left the factory. Cut the sleeve open and that assembly no longer exists. What you have afterwards is an unrated joint carrying a rated run, and it will be judged by the one section nobody rated.
So the useful question is not "which sealant is waterproof". It is: can this joint be made into something that was effectively tested again — and what does "tested" mean when you are standing on a scaffold with a cartridge gun?
This is written from the manufacturer's side. We build pixel and strip product from IP20 through IP68, which means the advice below includes the cases where buying a differently rated strip is the wrong fix.
What IP67 covers — and what it stops covering at the first cut
The code comes from IEC 60529, the ingress protection standard. The second digit is the water test; 7 is defined narrowly and mechanically: immersion up to one metre, for 30 minutes, with the enclosure positioned so that its lowest point sits 1,000 mm below the surface, or its highest point 150 mm below, whichever is deeper. The IEC's own explainer makes the same point in plainer words: the standard exists so that buyers do not have to rely on marketing terms like "waterproof".
Four consequences matter for anyone sealing a joint:
The grades do not stack. Water ratings are not cumulative beyond IPX6: a product that passes the immersion test at 7 is not automatically compliant with the jet tests at 5 or 6, because a submerged seal and a jet-loaded seal fail differently. If your run gets pressure-washed, IP67 tells you nothing about that — ask for the jet rating separately.
The standard tests in fresh water. Salt water, pool chemistry, oils and solvents are outside what the rating certifies. A coastal or poolside run is a harder problem than the label suggests, and the failure mode shifts from "water got in" to "chloride got in and stayed".
The rating describes an enclosure, not a circuit board. The number on the datasheet describes the sealed thing that was tested. The same board is sold as "IP20–68" precisely because the protection layer changes; each variant carries its own result.
Cutting, splicing or adding a connector that was not part of the test ends that description. From that moment the run is a rated length of strip plus an unrated joint, and the joint is where water will arrive first, because it is the only place with an opening, a bond line and two materials that expand differently.
If you are still choosing a grade rather than sealing one you already own, the IP rating ladder for outdoor pixel LEDs covers the whole scale, and the IP65 vs IP67 comparison is the one that matters for a joint, since most joint failures happen on runs specified at the lower of those two.
How water actually gets into a sealed joint
Almost no outdoor LED joint fails because water was pushed through it. At one metre of depth the pressure is about 0.1 bar — roughly a tenth of an atmosphere, and less than a garden hose delivers at the nozzle. Failures come from four slower mechanisms, and each one has a different remedy.
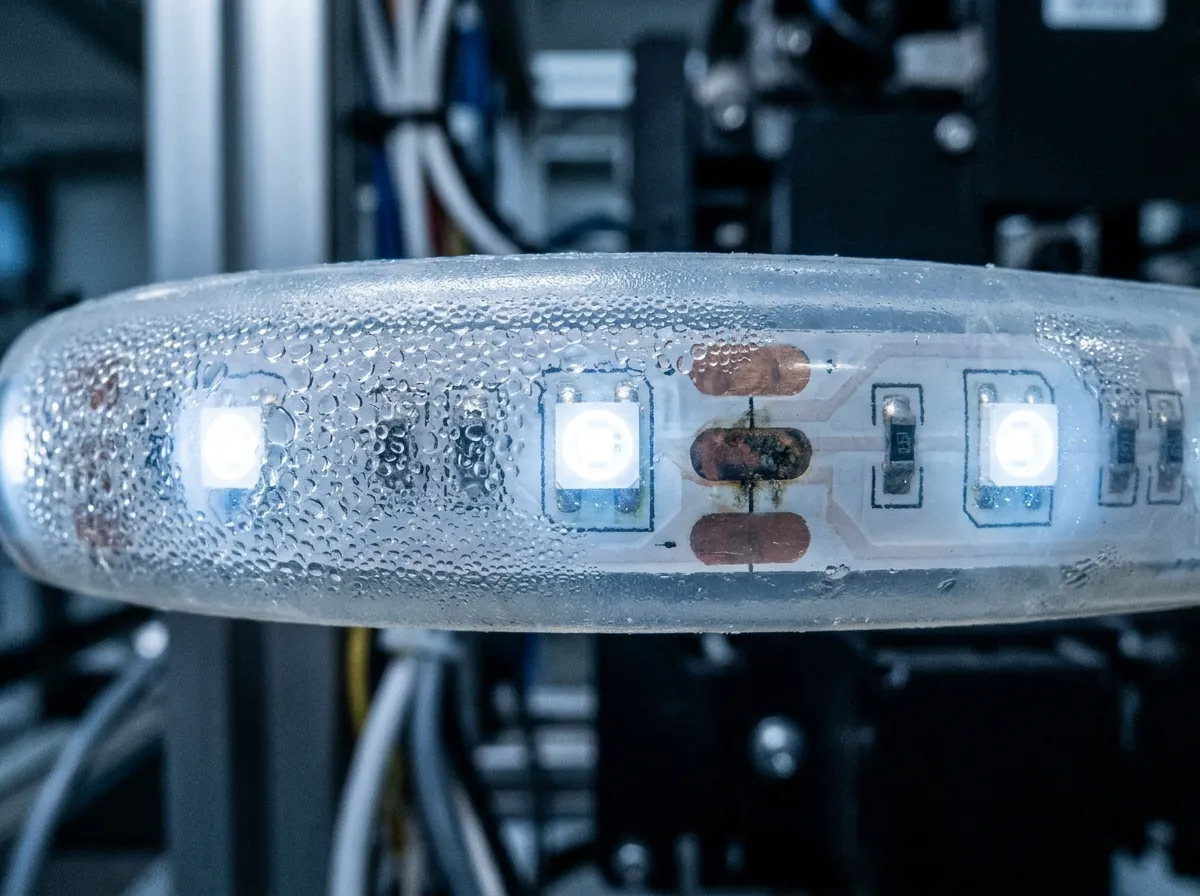
Capillary wicking. A hollow silicone sleeve is a tube. Once the end is open, or once the seal at the end has a hairline gap, water is drawn along the inside of the tube by surface tension, not by pressure. It travels tens of centimetres and stops where the copper is warmest and dirtiest — usually at the pads near the joint, not at the joint itself. This is why a run can "fail" half a metre away from the obvious suspect.
Breathing and condensation. Silicone is flexible because its Si-O backbone rotates freely and the chains pack loosely, which leaves a high free volume between them; it is that free volume, not pores, that water vapour crosses, so the wall breathes while still holding liquid water. A sealed hollow tube heats and cools every day, its trapped air expanding and contracting against a wall that vapour can cross; what gets in condenses on the coolest surface, which at night is the sleeve wall and the copper. You can seal a tube perfectly and still find droplets inside it after a season. The factory answer to this is not more sealant — it is filling the tube so there is no air volume left to condense in.
Strain on the pads. A joint is a stiffness discontinuity: rigid solder, soft sleeve, stiff cable. Every time the run moves — thermal expansion, wind, someone leaning on a cable — the movement concentrates at the pad. The pad lifts, the seal opens by a fraction of a millimetre, and wicking starts. Strain relief is not a nicety, it is part of the seal.
Interface ageing. UV, heat and plasticiser migration attack the bond line between sealant and silicone, or between heat-shrink adhesive and sleeve. The joint does not crack; it un-bonds, quietly, over two or three summers.
Practical translation: wicking needs the void filled, condensation needs the void removed, strain needs mechanical support within a short distance of the joint, and ageing needs the right chemistry and the right colour. If a sealing method does none of those four things, it is decoration.
These failures are why the outdoor IP rating selection guide puts joint design ahead of grade choice for anything mounted below a metre.
Four ways to close a joint, ranked by what they actually restore
Method | What it restores | Where it fails | Verdict |
|---|---|---|---|
Factory over-moulded end or connector | The only option still inside a tested assembly | Requires the length to be ordered to size | Best, wherever the run can be measured in advance |
Silicone end cap + neutral-cure silicone | The enclosure geometry, if the fill is complete | Voids, and cure depth in a deep cap | Good, when the fill is controlled and inspected |
Adhesive-lined (dual-wall) heat-shrink over a soldered splice | A bonded, strain-resistant seal at a strip-to-cable transition | Bonds to cable and solder, not to the silicone sleeve; adhesive must actually melt | Standard on the cable side; a sleeved end still needs a filled cap |
IP-rated screw connector with O-ring | A serviceable, re-openable joint | O-ring not seated, nut not compressed, mismatched pair | Good above water, if hand-tightened and inspected |
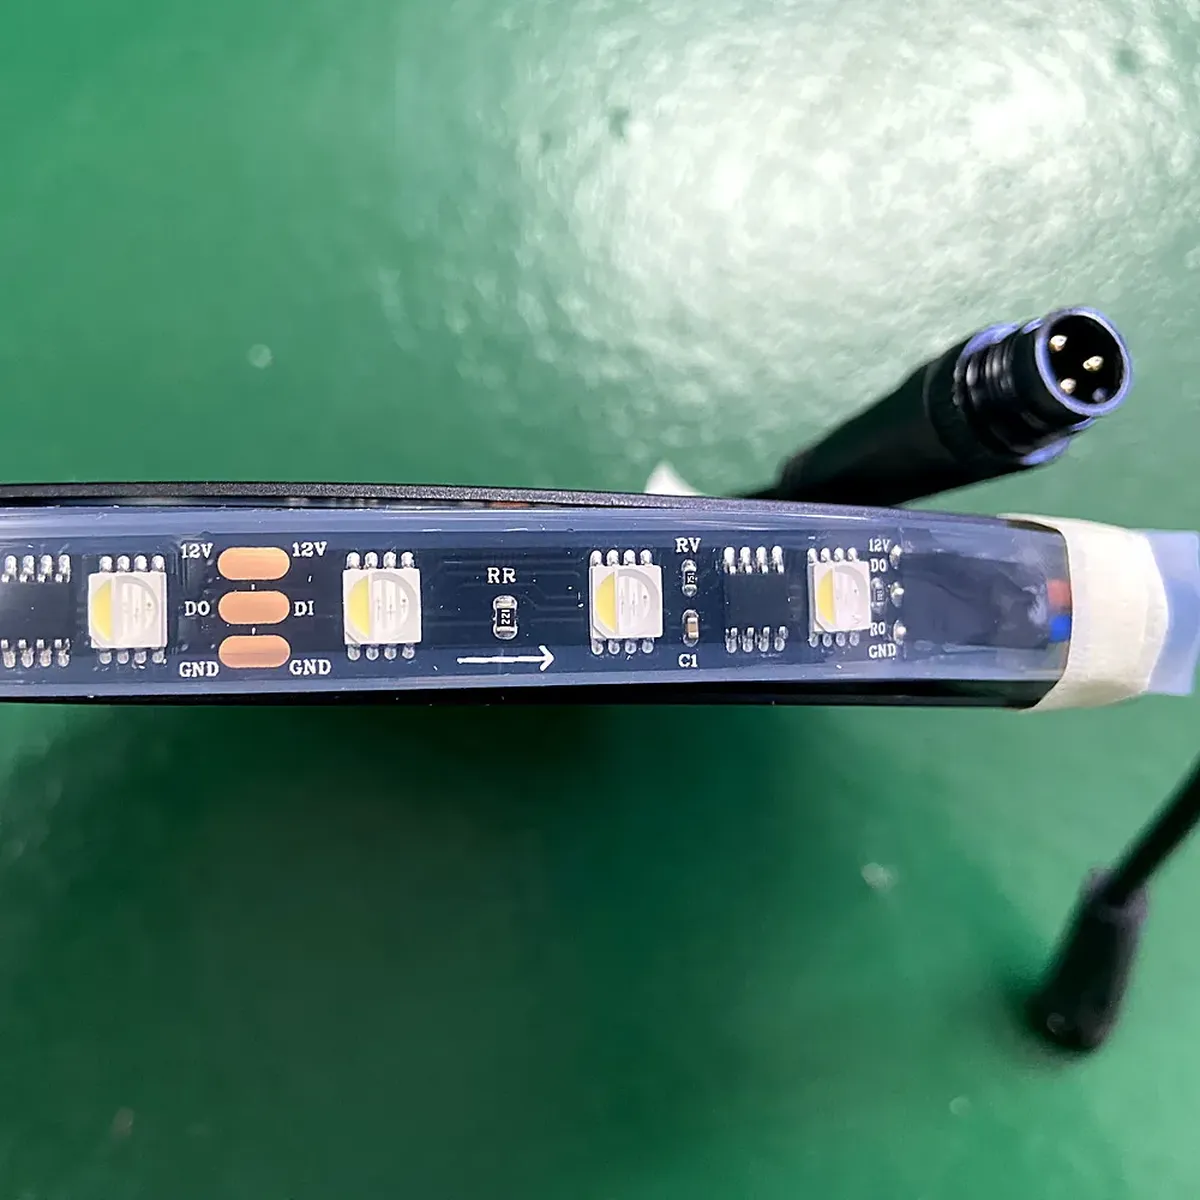
Factory over-moulding is the only method that does not create an unrated assembly, because the termination is part of what gets tested. It is also the one the buyer controls least at installation time — which is exactly why it belongs in the order, not in the toolbox. A moulded transition is visible: the sleeve, the moulded body and the cable jacket become one continuous form with no seam to inspect. That visibility is the whole point — it is the one method you can specify and then check on arrival. On an IP68 addressable RGBW strip order, ask the supplier for the termination process sheet (mould tool, encapsulant, cure schedule) and inspect the incoming lengths against that drawing. A body you can peel away from the jacket, or a cap that is a separate part pushed onto the sleeve, is not a moulded transition — it is one of the field methods below, and it should be documented as such.
End caps with neutral-cure silicone are the field standard, and they are better than their reputation — the failures are mostly fill failures, and the next most common is a bond that was never primed, rather than a material that could not do the job. The cap must be filled so that inserting the strip displaces silicone around every pad rather than trapping a bubble behind it. Translucent caps and translucent sleeves are worth specifying for one reason: you can see whether you succeeded.
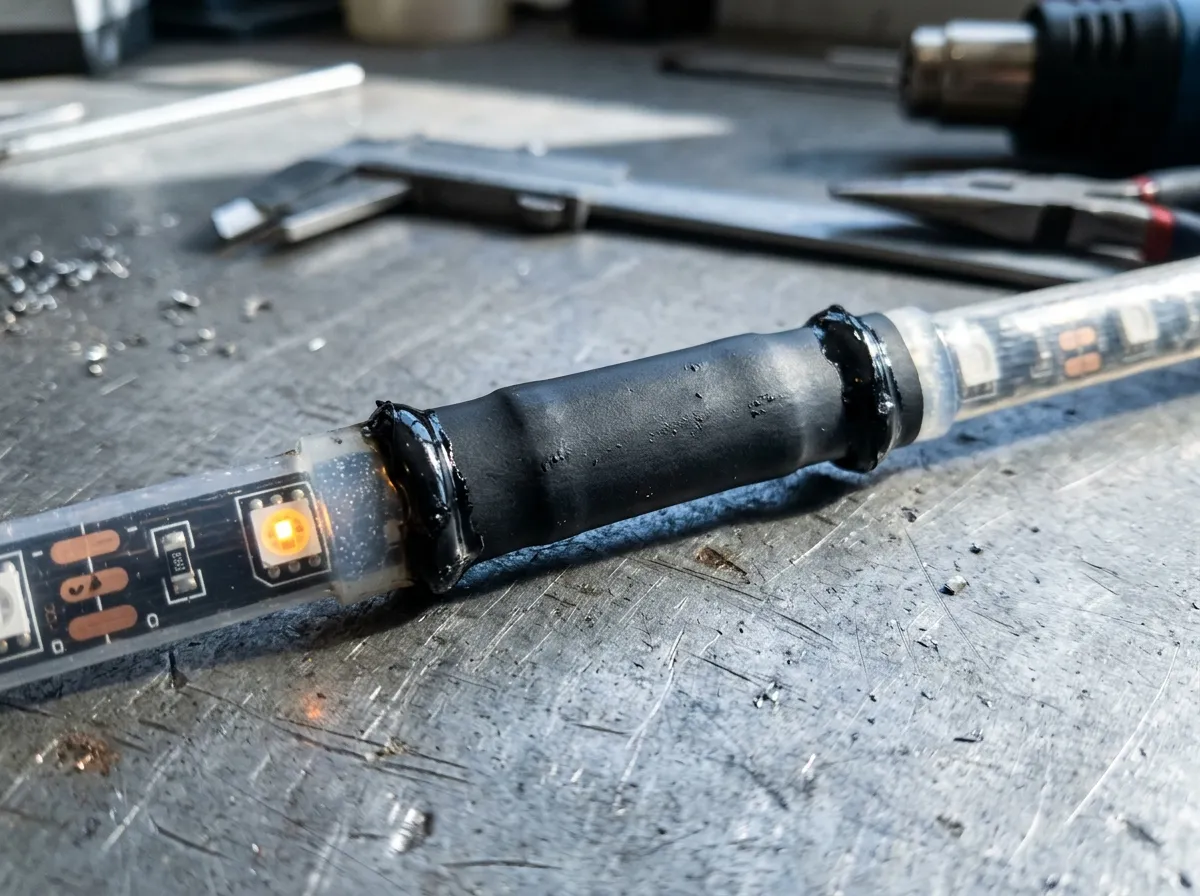
Dual-wall heat-shrink is the standard answer for the cable side of a transition, and not enough on its own for a sleeved strip that will sit in water. The inner thermoplastic adhesive melts, bonds to the cable jacket and the solder bundle, and fills the gap around them — but it forms no chemical bond to the silicone sleeve, so the sleeve-to-tube interface stays a mechanical fit, which is exactly the capillary path described above. Use it where the cable leaves the strip, and still cap and fill the sleeved end. It fails outright when someone reaches for single-wall tubing, which insulates the joint and seals nothing.
Screw-type IP-rated connectors are the correct choice where the joint must be reopened for service — a stage rig, a rental fixture, a maintenance point. Their protection is a function of the mated pair as supplied: seat the O-ring, hand-tighten the nut, and never mix halves from different families. The wider pixel strip accessories range exists because connector families differ in exactly these details.
Four things that are not sealing methods, whatever the site folklore says: electrical tape (the adhesive migrates and leaves a gap), hot-melt glue (it softens again on a sunlit facade), single-wall heat-shrink (insulation, not a seal), and acid-cure silicone (see below — it attacks the copper it is supposed to protect).
The sealant decision: neutral cure, and why the bathroom tube is wrong
One-part silicone sealants cure by reacting with moisture in the air, and the by-product of that reaction is what decides whether the joint survives. Acetoxy-cure sealants — the vinegar-smelling tubes sold for bathrooms and windows — release acetic acid as they cure. Adhesive manufacturers draw the line explicitly: the acetic acid emission "could potentially have an adverse effect on some of the components involved", which is why electronics work uses neutral-cure systems instead, where the by-product is an alcohol or acetone rather than an acid.
On an LED strip the vulnerable part is bare copper and the solder on it. An acid that is present while the sealant skins over, trapped under a cap with nowhere to go, is a corrosion cell with a warm, humid microclimate around it. The failure looks like a dark segment three months later, not like a leak.
Four rules follow:
- Buy "neutral cure" or "electronics grade", not "sanitary". If the tube does not name the cure chemistry, it is not the right tube for a copper joint.
- Prime the sleeve, or buy a silicone sold as self-adhesive for silicone. Cured silicone rubber is one of the harder substrates to bond: without a primer, or a formulation labelled for silicone-to-silicone, the sealant skins over and then sits on the surface instead of attaching to it. This is the most common reason a cap that looked perfect lifts off in year two, and it is invisible on the day you install it.
- Respect cure depth, not just cure time. Moisture-cure silicone skins over and then cures inward; a thick plug cures far more slowly than the 24-hour figure people quote. Cap fills should be modest and worked into place, not dumped in.
- Silicone is a seal, not a structural element. It will not hold a cable, damp vibration, or replace a clip. Anything that loads the joint has to be carried by the mounting.
Sealing a cut end in eight steps
This is the sequence for a hollow-sleeve IP67 strip where the run ends, or where a cable tail leaves it. It assumes you have neutral-cure silicone, a cap that matches the sleeve profile, isopropyl alcohol, and either a primer for silicone or a sealant sold as self-adhesive.
- Cut only on the marked line, between pad groups. A cut through a pad leaves a stub you cannot use and a copper edge that will corrode first. Check: both pads in the last group are intact and unpitted.
- Retract the sleeve 10–15 mm — slide it back along the strip, do not cut it off. No further than that. The sleeve you keep is both the surface the cap seals against and the tube whose bore has to be filled; every extra millimetre of exposed strip is a millimetre of unsealed board, and a sleeve cut back flush with the last pad leaves nothing for the cap to grip.
- Clean both surfaces with 99% isopropyl alcohol and let it flash off for a minute, then prime the sleeve if your sealant is not self-adhesive. Silicone does not bond to mould release, dust or finger grease; a wiped joint is not a clean joint, and a clean silicone surface is still a poor one to bond without primer.
- Fill the cap roughly two-thirds, and fill the sleeve bore too. Push the strip in so the silicone is displaced around the pads, then work a bead into the open end of the retracted sleeve, over and past the last pad, until the bore stops taking it. The cap closes the annulus between cap and sleeve outer wall; it does not close the tube. An unfilled bore is the capillary path from the section above, left open by hand. Inserting into an under-filled cap is how voids form.
- Seat the cap until it bottoms out, and hold it there. Excess should appear as a continuous bead all the way round the lip — if it appears on one side only, the cap is cocked and the seal is one-sided.
- Wipe the bead smooth without pulling it away from the joint. You are shaping the fillet, not removing it.
- Cure flat, at room temperature, for 24 hours minimum before power or water. Cold weather stretches that; a 10 °C workshop is not a 20 °C workshop.
- Support the cable within 50 mm of the cap with a clip or a gland. The seal should never be the thing holding the weight.
Pass criteria, in the order you can check them: no visible voids through a translucent cap or sleeve; a continuous 360° fillet; the cap cannot be twisted by hand once cured; a gentle pull on the cable moves the clip, not the cap. Twisting alone does not prove adhesion — a cap with a mechanical interference fit resists it while bonded to nothing — so the bond line is checked destructively, on one sample: opened lengthwise, it should still carry silicone attached across the full lap. Bare, glossy sleeve where the sealant should have gripped is a fail, not a cosmetic note.
Joining two lengths: solder, then dual-wall shrink
Where two strip lengths have to meet, the order of operations decides the result.
Slide the heat-shrink on before you solder. Then solder. Forgetting the tube is the most expensive mistake in this sequence, because the only recovery is desoldering a joint you have already made and sealed.
Stagger the two joints by 10–15 mm along the run rather than stacking them at the same point. A staggered pair keeps the bundle round, keeps the shrink from bridging an air gap, and stops both joints from flexing against each other.
Keep the heat short and local. These pads are thin copper on a plastic carrier; a long dwell lifts the pad and takes the seal with it. Tin both sides, make the joint, and get off the pad.
Test before you seal. Continuity, and a full colour sweep on an addressable run. Once the adhesive-lined tube is shrunk, re-work means cutting the joint out and losing length.
Clean the flux residue. Flux left under a sealed joint is a corrosive layer in a humid microclimate, and it is invisible once the tube is on.
Then shrink with adhesive-lined, dual-wall tubing, 3:1 where the profile allows it. Polyolefin heat-shrink is specified by a recovery temperature and a shrink ratio — take the recovery temperature from the tube's own datasheet rather than from a rule of thumb, because the number you actually have to control is how long the pad sits at it. The standard product is 2:1 diametrically, with 3:1 available in the better grades — which matters when you are going from a flat strip to a round cable bundle. The adhesive lining is a layer of thermoplastic that melts and fills the gap; without it you have a mechanical cover, not a seal. Specify black for outdoor work: coloured and clear formulations have poorer UV resistance.
Overlap at least 10 mm onto sound material on both sides of the joint, heat from the middle outwards, and watch the ends.
Field rule: if you cannot see a ring of adhesive squeezed out at both ends of the tube, you have not sealed the joint — you have insulated it.
Proving the joint holds before you close the wall
You cannot certify a field joint. You can, however, prove that your process is under control — and that is what a client's QA is actually asking for.
Build a mock joint from the same offcuts, with the same materials, made by the same person who will make the real ones. Ten centimetres is enough.
Immerse it using the IPX7 geometry, because that geometry is the one everybody recognises: one metre of depth, 30 minutes, with the lowest point a metre below the surface (or the highest point 150 mm below, whichever is deeper), in fresh water at ambient temperature. A tall bucket and a ruler will do it.
Measure before and after. Record insulation resistance from conductor to the water, or conductor to conductor, on dry samples and again after the soak and a short drain. You are not looking for an absolute pass mark so much as a change: a reading that collapses by orders of magnitude means water reached metal.
Flex it, then check again. Bend the joint through a modest arc ten times and repeat the electrical check. A joint that passes wet but fails after flexing has a strain problem, and it will fail on the facade.
Cut one open — this is a pass criterion, not a bonus check. Slice the cured cap and the retracted sleeve lengthwise and read three things: the sleeve bore behind the last pad, which should be solid silicone with no open tube left to wick along; the bond line, which should still carry silicone attached to the sleeve wall rather than lifting away clean; and the water path, if the soak found one — a dark trace along the copper, a void where the silicone did not reach. One cut sample teaches more than ten passed ones.
Write down what you did: date, materials and batch, the person who made it, the readings, the outcome. That sheet is the difference between "we seal our joints properly" and a claim you can defend in a snagging meeting. Keep the same discipline for low-level and buried runs, where the failure modes of underground lighting are compounded by permanent moisture.
Where a joint should not exist at all
The most reliable joint is the one you did not make. Three habits remove most of the risk before anyone picks up a cartridge gun.
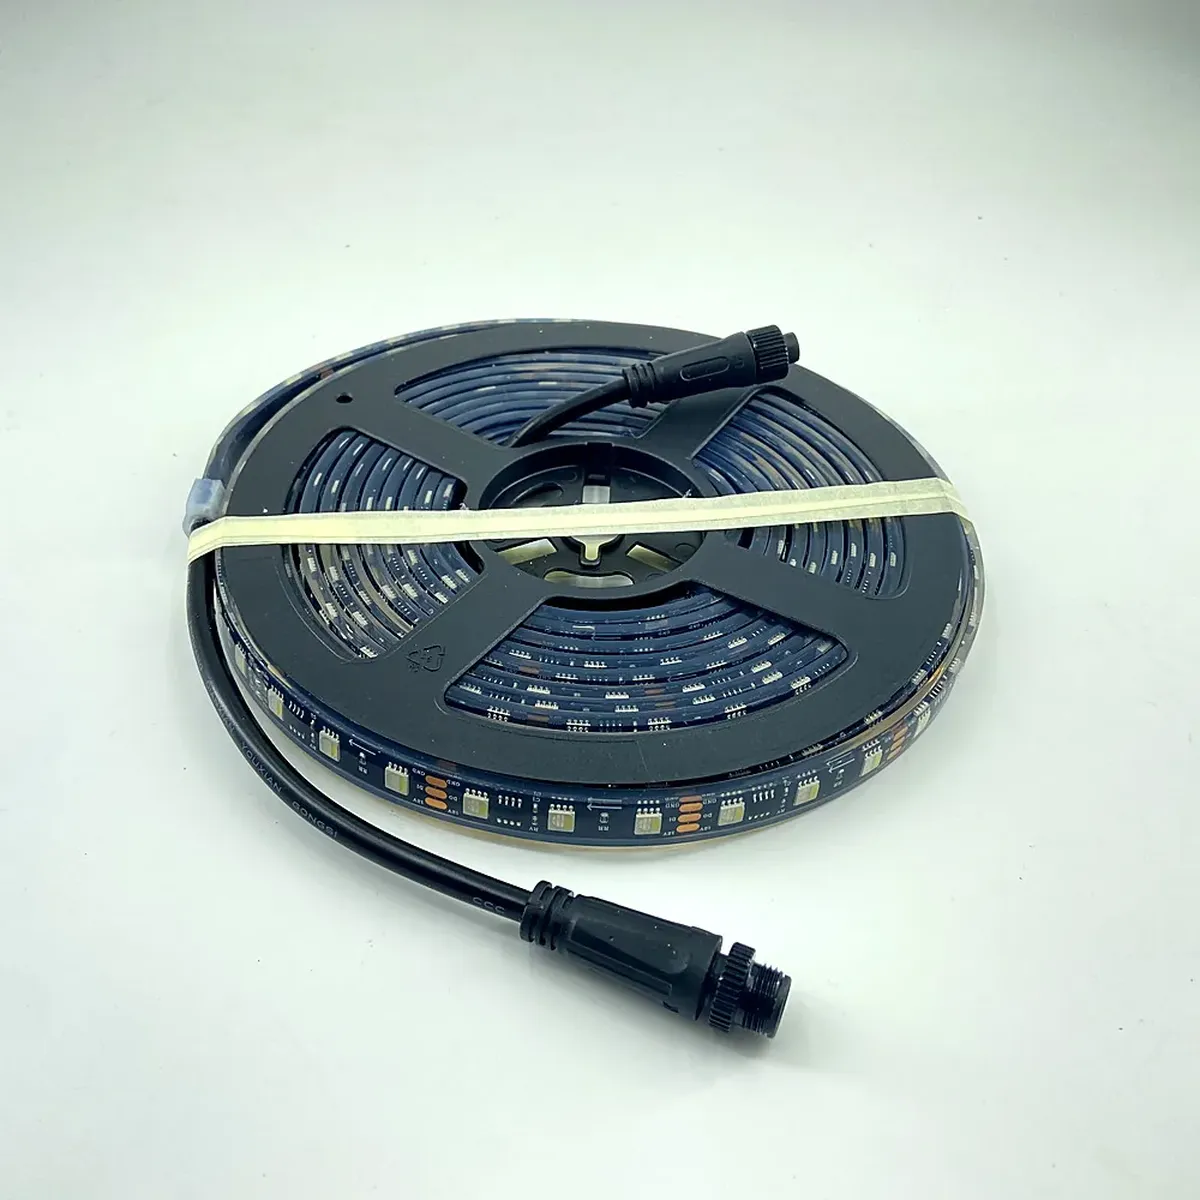
Order to length with factory terminations. Every cut you avoid is a joint you do not have to seal, inspect and defend. This is the whole argument for specifying moulded ends and connectorised lengths on long or high runs, and it is mandatory logic for IP68: continuous immersion has no declared depth or duration you can claim for a site-made joint, so the joint has to be either factory-made or housed above the water. The IP67 vs IP68 comparison explains why the higher grade is not a hedge against a bad joint.
Keep joints out of the water path. Above the water line, on the dry side of a wall, under a drip loop rather than at the bottom of one. A joint at the low point of a run is a joint that spends the wet season submerged by gravity.
Give water a way past. Drip loops before glands, glands sized to the actual cable diameter, a gasketed enclosure for any mains or driver connection, profiles mounted face-down or with weep holes at the low points. And never bury a joint inside a profile you cannot open again — the first service visit will destroy it.
What to write into the specification
If you specify rather than install, these five clauses do more for a project than any note about IP grade:
- Terminations: "All lengths factory-terminated with moulded ends or IP-rated connectors. No field joints below the water line."
- Sealant: "Neutral-cure, electronics-grade silicone only, applied with the manufacturer's primer for silicone substrates or a sealant specified as self-adhesive. Acid-cure sealants are not permitted on copper terminations."
- Connectors: "IP-rated connector families with O-rings, mated as supplied. Solderless clip connectors are not permitted on exterior runs."
- Verification: "Sample joints tested to IPX7 conditions (1 m, 30 min, fresh water) with insulation resistance recorded before and after. Test report submitted with the O&M file."
- Re-work: "Any re-termination voids the previous seal record and requires re-testing."
None of that makes a field joint IP67. What it does is make the joint an inspected, documented part of the installation instead of the one item nobody checked — which is the only thing that was ever going to save the run.
PILEDS builds pixel and strip product in Shenzhen, from IP20 through IP68. If you are working out how much of a run can arrive pre-terminated, send us the run lengths and the environment; we will tell you which ones can be moulded at the factory and which will have to be jointed on site.
Specifying pixel LED for a real project?
Send the spec — pitch, IC, IP class, run length, voltage — and you get an engineer's answer, not a catalogue. Samples and OEM/ODM quotes from the Shenzhen factory floor.